Countdown Clock Mini Desserts
Countdown Clock Mini Desserts
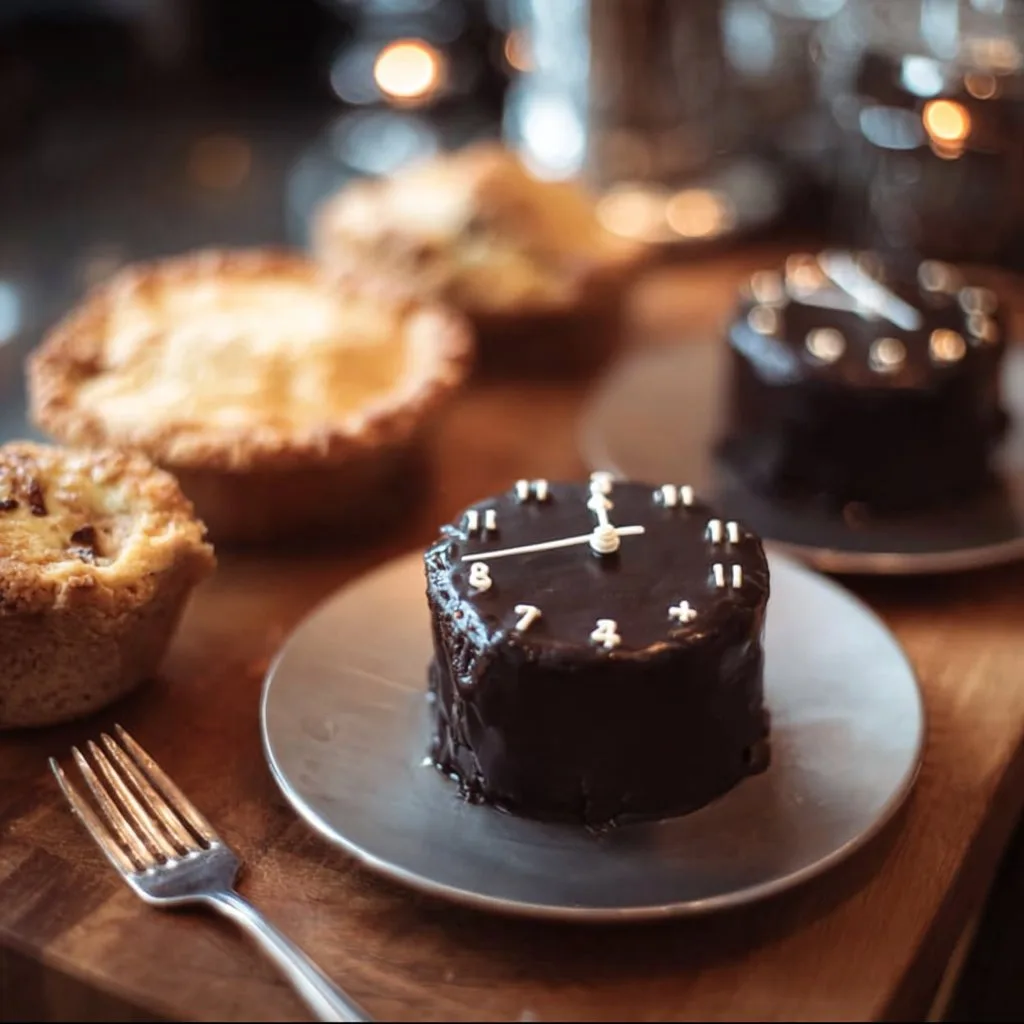
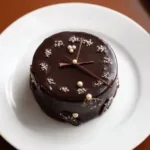
Countdown Clock Mini Desserts add a fun and festive touch to any celebration. These delightful mini cakes are not only visually appealing but also delicious and easy to make. Perfect for parties, especially New Year’s Eve or birthday celebrations, they are sure to impress your guests with their playful clock design.
Thank you for reading this post, don't forget to subscribe!Why You’ll Love This Countdown Clock Mini Desserts

These Countdown Clock Mini Desserts stand out as a creative and tasty treat. Their small size makes them perfect for portion control, and the design allows you to get creative with decorations. You can customize the colors and designs to fit any theme or occasion. Plus, they pair wonderfully with a variety of beverages, making them a versatile choice for any event.
How to Make Countdown Clock Mini Desserts
Ingredients:
- 1 cup all-purpose flour
- 1/2 cup granulated sugar
- 1/4 cup unsalted butter, softened
- 1/3 cup whole milk
- 1 large egg
- 1 teaspoon vanilla extract
- 1/2 teaspoon baking powder
- 1/4 teaspoon salt
- 1/2 cup unsalted butter, softened (for frosting)
- 1 1/2 cups powdered sugar
- 2 tablespoons milk (for frosting)
- 1/2 teaspoon vanilla extract (for frosting)
- Gel food coloring (black, gold, silver, yellow; as desired)
- Edible gold or silver pearls
- Mini chocolate chips or black decorating gel for clock hands and numbers
- Sprinkles (optional)
Step-by-Step Instructions:
- Preheat the oven to 350°F. Line a mini muffin tin with paper liners or lightly grease.
- Cream together the softened butter and granulated sugar in a mixing bowl until light and fluffy.
- Add the egg and vanilla extract, mixing until fully incorporated.
- In a separate bowl, whisk together the all-purpose flour, baking powder, and salt.
- Gradually add half of the dry ingredients to the wet mixture, followed by the milk. Finally, add the remaining dry ingredients. Mix until just combined.
- Divide the batter evenly among the mini muffin cups, filling each about two-thirds full.
- Bake for about 10 minutes or until a toothpick inserted in the center comes out clean. Let the mini cakes cool completely on a wire rack.
- In another bowl, beat the softened butter until creamy. Gradually add the powdered sugar, mixing well.
- Add the milk and vanilla extract to the frosting mixture and beat until fluffy.
- Divide the frosting into small bowls and tint with desired gel food coloring.
- Once cooled, frost each mini cake evenly with the colored buttercream.
- Use decorating gel, chocolate chips, or colored frosting to depict clock faces, numbers, and hands pointing to midnight. Finally, add edible pearls and optional sprinkles.
- Arrange the decorated mini cakes on a platter and present immediately.
How to Serve Countdown Clock Mini Desserts
These Countdown Clock Mini Desserts can be served in a variety of ways. For a festive touch, display them on a decorative platter with a fun centerpiece. Pair them with a selection of beverages, such as sparkling grape juice or flavored soda, to keep the celebration lively. Guests will love to grab these individual mini desserts, making them ideal for parties where finger foods are preferred.
How to Store Countdown Clock Mini Desserts
To keep your Countdown Clock Mini Desserts fresh, store them in an airtight container. They can be kept at room temperature for up to three days. If you want to extend their shelf life, you can freeze them. Wrap each mini cake in plastic wrap, then place them in a freezer-safe container. They can be frozen for up to a month. Thaw them in the refrigerator before decorating and serving.
Tips to Make Countdown Clock Mini Desserts Perfect
- Ensure your butter is softened for easy creaming with sugar.
- Mix the batter gently to avoid over-mixing; this keeps the cakes light and fluffy.
- Use a toothpick to create clock designs for added precision.
- Experiment with flavor extracts, such as almond or lemon, to give the mini cakes a unique twist.
- If you’re short on time, using store-bought frosting can simplify the decorating process.
Flavor Variations
Feel free to play around with flavors in your Countdown Clock Mini Desserts! You can substitute vanilla extract with almond or lemon extract for different taste profiles. Additionally, consider adding flavored gel food coloring, like raspberry or mint, for a refreshing twist. Mixing in chocolate chips or nuts into the batter can also enhance the overall flavor experience.
Pro Tips for Success
- Always preheat the oven to ensure even baking.
- Use a kitchen scale for more accurate measurements.
- Allow the mini cakes to cool completely before frosting to prevent melting.
- When frosting, use a piping bag for a professional-looking finish.
- Be creative with your toppings. Aside from edible pearls, try crushed candies or seasonal decorations for special occasions.
FAQs About Countdown Clock Mini Desserts
1. Can I make these mini desserts in advance?
Yes, you can prepare the mini cakes a day in advance. Keep them in an airtight container without the frosting. Frost them just before serving for the best presentation.
2. What can I use instead of gel food coloring?
You can use liquid food coloring, but the vibrant colors may not be as rich. For a natural option, consider using fruit purees or vegetable colors.
3. How can I make these mini desserts gluten-free?
To make gluten-free Countdown Clock Mini Desserts, substitute all-purpose flour with a 1:1 gluten-free flour blend. Ensure that all other ingredients are gluten-free as well.
Final Thoughts
Countdown Clock Mini Desserts are a delightful and creative addition to your dessert table. Their cute clock design makes them perfect for special occasions, and their easy preparation allows you to enjoy the celebration without spending hours in the kitchen. Experiment with flavors and decorations to make each batch unique. Whether you’re ringing in the New Year or celebrating any special event, these mini desserts will surely be a hit!
Countdown Clock Mini Desserts
Ingredients
Method
- Preheat the oven to 350°F (175°C). Line a mini muffin tin with paper liners or lightly grease it.
- Cream together the softened butter and granulated sugar in a mixing bowl until light and fluffy.
- Add the egg and vanilla extract, mixing until fully incorporated.
- In a separate bowl, whisk together the all-purpose flour, baking powder, and salt.
- Gradually add half of the dry ingredients to the wet mixture, followed by the milk. Finally, add the remaining dry ingredients and mix until just combined.
- Divide the batter evenly among the mini muffin cups, filling each about two-thirds full.
- Bake for about 10 minutes or until a toothpick inserted in the center comes out clean. Let the mini cakes cool completely on a wire rack.
- In another bowl, beat the softened butter until creamy. Gradually add the powdered sugar, mixing well.
- Add the milk and vanilla extract to the frosting mixture and beat until fluffy.
- Divide the frosting into small bowls and tint with desired gel food coloring.
- Once cooled, frost each mini cake evenly with the colored buttercream.
- Use decorating gel, chocolate chips, or colored frosting to depict clock faces, numbers, and hands pointing to midnight. Finally, add edible pearls and optional sprinkles.
- Arrange the decorated mini cakes on a platter and present immediately.