Homemade Naturally-Sweetened Marshmallows
Homemade naturally-sweetened marshmallows offer a delightful twist on a classic treat. They are fluffy, delicious, and made without refined sugars. This recipe combines wholesome ingredients to create a sweet snack that everyone kids and adults alike will love.
Thank you for reading this post, don't forget to subscribe!Table of Contents
Why You’ll Love This Homemade Naturally-Sweetened Marshmallows
These marshmallows are not just a guilt-free indulgence; they are simple to make and incredibly versatile. You can enjoy them on their own, add them to hot cocoa, or even use them for s’mores. With natural sweeteners, you can indulge your sweet tooth without the sugar crash.
How to Make Homemade Naturally-Sweetened Marshmallows
Ingredients:
- 1 cup water (divided)
- 2 tablespoons powdered gelatin (unsweetened)
- 1/2 cup honey or maple syrup
- 1/4 teaspoon salt
- 1 teaspoon vanilla extract
- Cornstarch (for dusting)
Step-by-Step Instructions:
Prepare the Gelatin: In a mixing bowl, combine 1/2 cup of cold water with the powdered gelatin. Stir and allow it to bloom for about 5-10 minutes.
Heat the Mixture: In a saucepan, combine the remaining 1/2 cup of water, honey (or maple syrup), and salt. Heat this mixture over medium heat until it reaches 240°F (115°C). Use a candy thermometer for accuracy.
Combine Ingredients: Once the syrup has reached temperature, remove it from the heat. Slowly pour the hot syrup into the bloomed gelatin while mixing on low speed.
Whip the Mixture: Increase the mixer speed to high and whip the mixture for about 10-12 minutes, or until it becomes thick and fluffy. Add the vanilla extract and mix for an additional minute.
Prepare the Pan: Lightly grease a baking dish (9×9 inches) and dust with cornstarch to prevent sticking.
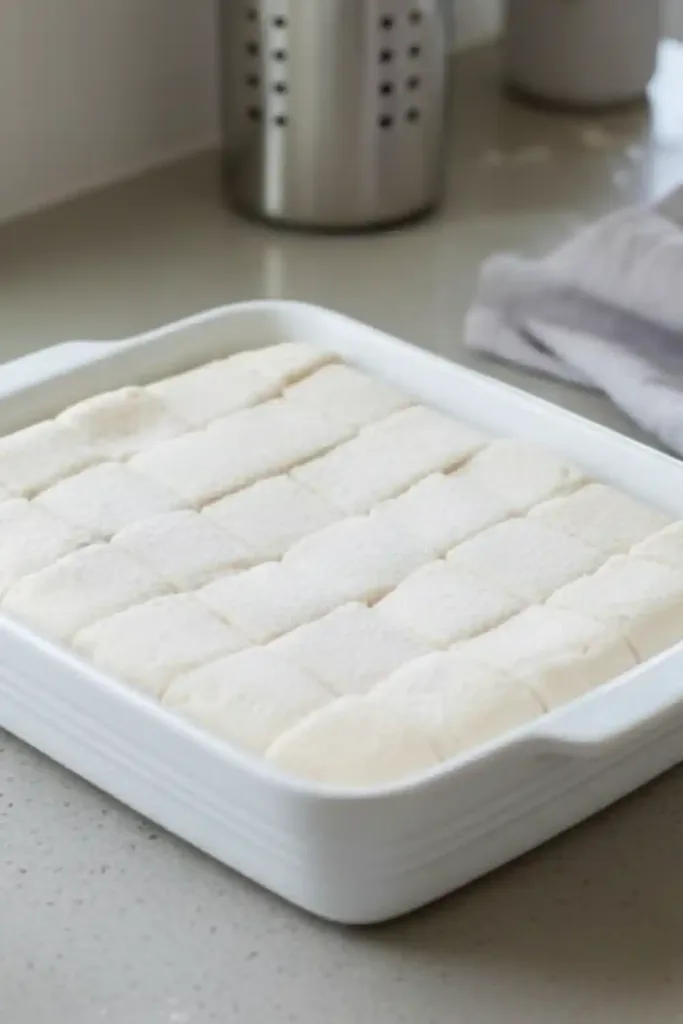
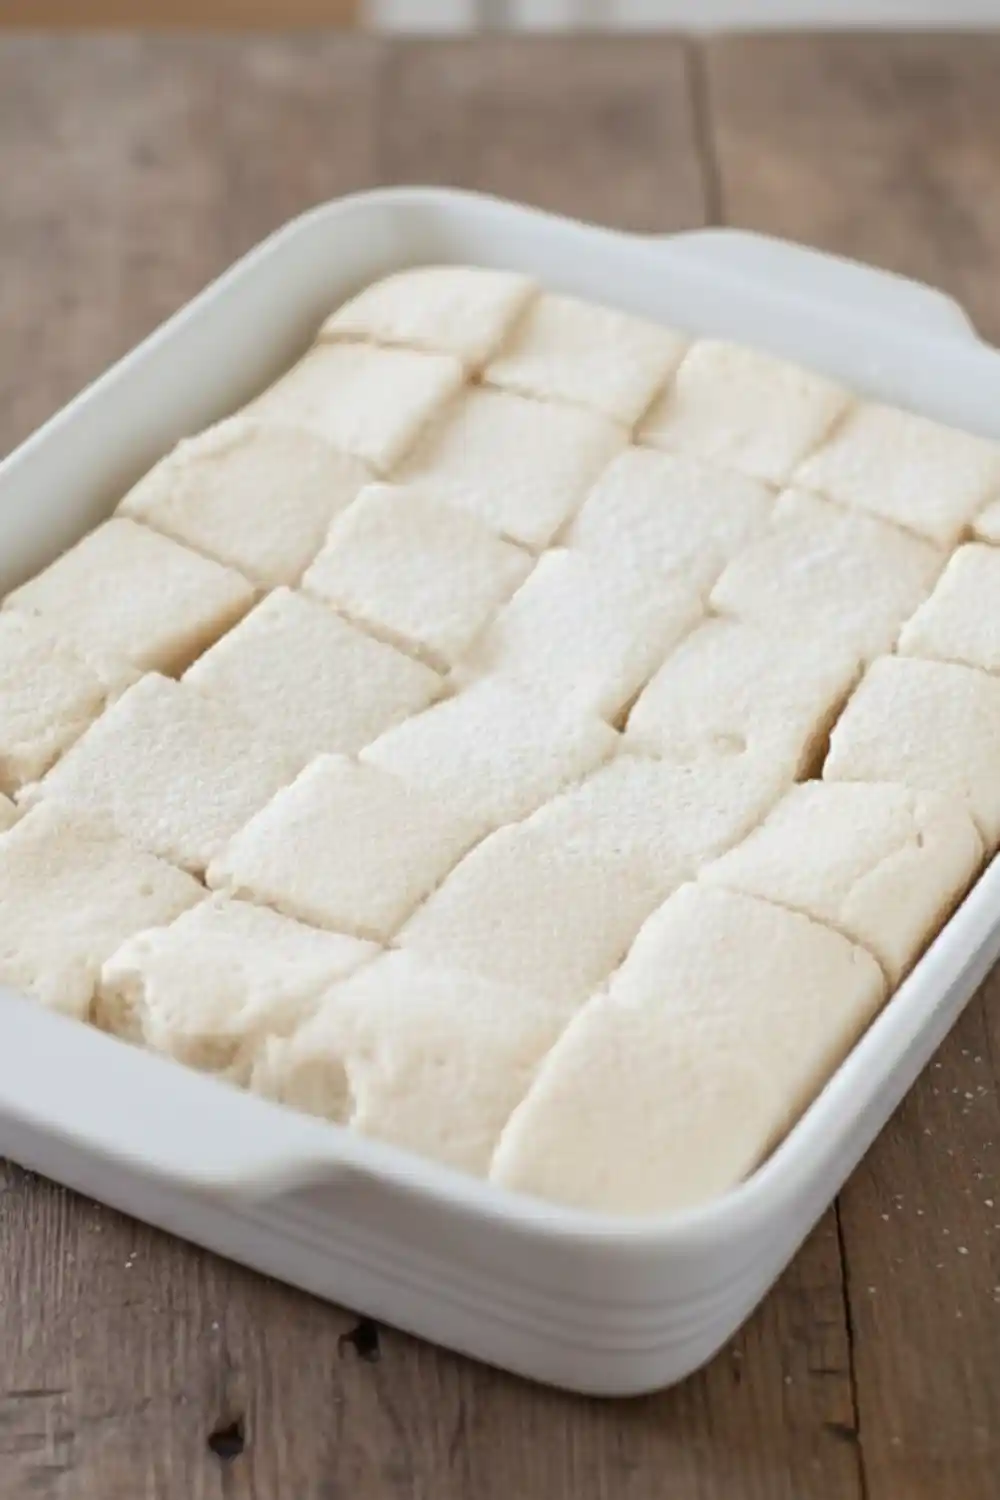
Transfer the Mixture: Pour the marshmallow mixture into the prepared pan, smoothing the top with a spatula. Dust the top with more cornstarch.
Set the Marshmallows: Allow the marshmallows to set at room temperature for at least 4 hours, or overnight for best results.
Cut and Serve: Once set, dust a cutting board with cornstarch. Turn the marshmallow slab out onto the board, cut into squares, and dust the individual pieces with more cornstarch.
How to Serve Homemade Naturally-Sweetened Marshmallows
Serving homemade marshmallows opens up a world of sweet possibilities. Enjoy them as they are, melt them in a warm cup of cocoa, or roast them over a fire for an indulgent s’more experience. You can also use them for baking or top desserts for added flair.
How to Store Homemade Naturally-Sweetened Marshmallows
To store your homemade naturally-sweetened marshmallows, place them in an airtight container. They can last for up to two weeks when stored in a cool, dry place. Be sure to separate layers with parchment paper to prevent them from sticking together.
Tips to Make Homemade Naturally-Sweetened Marshmallows Perfect
- Use Cold Water: The cold water helps in blooming the gelatin properly, ensuring a fluffier texture.
- Candy Thermometer: Use a candy thermometer for accuracy. The right temperature is crucial for achieving the perfect marshmallow consistency.
- Avoid Humidity: Keep your marshmallows in a dry environment as humidity can affect their texture and cause them to become sticky.
Flavor Variations
While the base recipe is delightful on its own, you can experiment with different flavors. Some popular variations include:
- Chocolate Marshmallows: Add 1/4 cup of cocoa powder to the gelatin mixture before whipping.
- Peppermint Marshmallows: Incorporate a few drops of peppermint extract for a refreshing twist.
- Citrus Marshmallows: Zest a lemon or orange into the mixture for a vibrant, citrusy flavor.
Pro Tips for Success
- Whipping Time: Ensure you whip the mixture long enough to achieve that airy, fluffy texture. If it seems too thin, continue mixing.
- Proper Storage: Make sure they are fully set before cutting; otherwise, they may flatten or stick together.
- Temperature Monitoring: Keep an eye on the syrup as it cooks. Overheating can cause the mixture to caramelize, leading to a different texture.
FAQs About Homemade Naturally-Sweetened Marshmallows
Can I replace honey with another sweetener?
Absolutely! You can substitute honey with maple syrup or agave nectar. Just ensure that the substitute has a similar consistency for best results.
How do I know when the syrup has reached 240°F?
Using a candy thermometer is the best way to check the temperature. Insert it into the syrup and wait for the reading to stabilize. If you don’t have one, you can test a drop of syrup in cold water to see if it creates a firm ball.
Can I make these marshmallows vegan?
Yes! To make a vegan version, use agar-agar instead of gelatin. The preparation process will differ slightly, so follow specific instructions for activating agar-agar.
Final Thoughts
Homemade naturally-sweetened marshmallows are a delightful and healthier alternative to store-bought options. They are easy to make, versatile, and perfect for multiple occasions. Whether you’re enjoying them on their own or incorporating them into other treats, these marshmallows are sure to bring joy to your family and friends. Embrace the homemade goodness and enjoy this sweet treat made with love!
Homemade Naturally-Sweetened Marshmallows
Ingredients
Method
- In a mixing bowl, combine 1/2 cup of cold water with the powdered gelatin. Stir and allow it to bloom for about 5-10 minutes.
- In a saucepan, combine the remaining 1/2 cup of water, honey (or maple syrup), and salt. Heat this mixture over medium heat until it reaches 240°F (115°C). Use a candy thermometer for accuracy.
- Once the syrup has reached temperature, remove it from the heat. Slowly pour the hot syrup into the bloomed gelatin while mixing on low speed.
- Increase the mixer speed to high and whip the mixture for about 10-12 minutes, or until it becomes thick and fluffy. Add the vanilla extract and mix for an additional minute.
- Lightly grease a 9×9 inch baking dish and dust with cornstarch to prevent sticking.
- Pour the marshmallow mixture into the prepared pan, smoothing the top with a spatula. Dust the top with more cornstarch.
- Allow the marshmallows to set at room temperature for at least 4 hours, or overnight for best results.
- Once set, dust a cutting board with cornstarch. Turn the marshmallow slab out onto the board, cut into squares, and dust the individual pieces with more cornstarch.