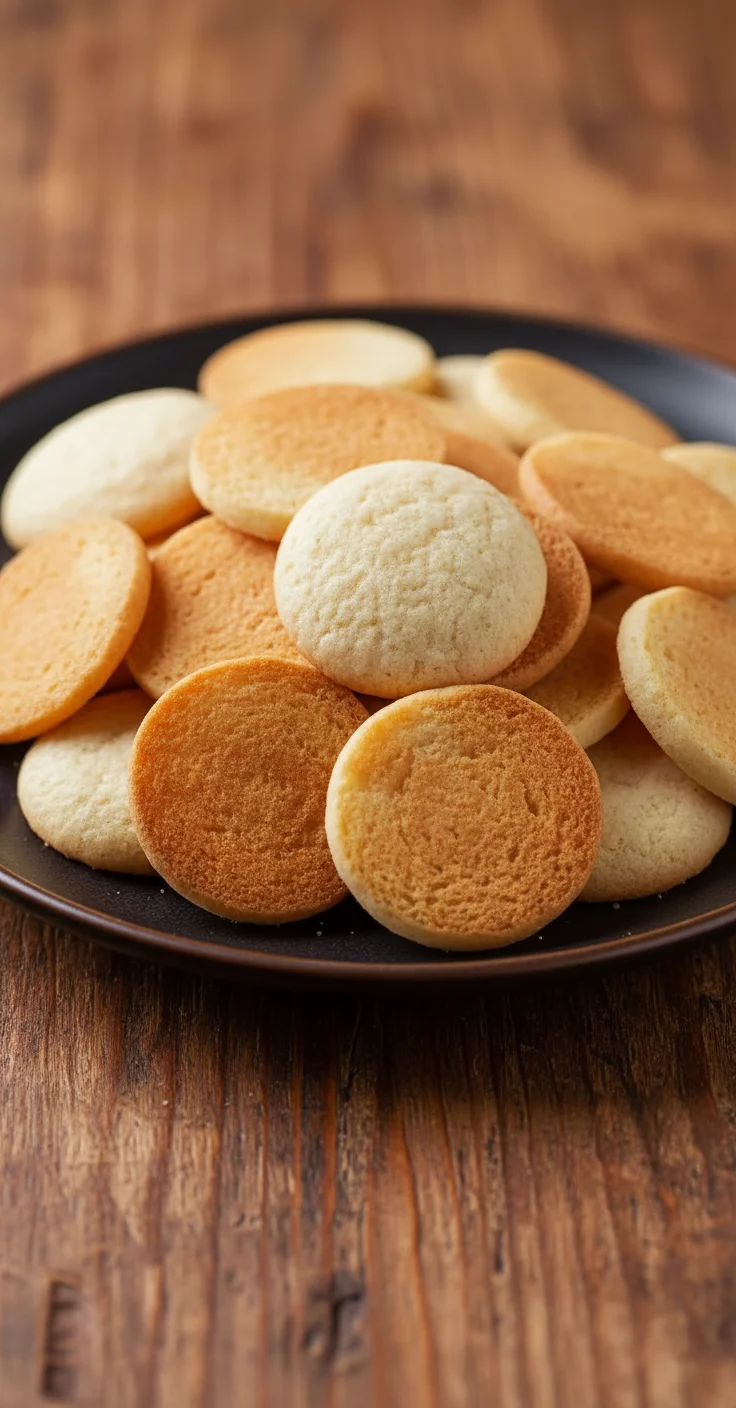
Homemade Vanilla Wafers
Homemade vanilla wafers are a delightful treat that brings a touch of nostalgia to your kitchen. With their crispy edges and soft centers, these vanilla wafers are perfect for snacking, pairing with desserts, or enjoying with a cup of tea. This simple recipe allows you to create delicious homemade vanilla wafers that will impress family and friends.
Thank you for reading this post, don't forget to subscribe!Table of Contents
Why You’ll Love This Homemade Vanilla Wafers
These homemade vanilla wafers are incredibly easy to make and require minimal ingredients you likely already have in your pantry. They are perfect for satisfying a sweet craving without being overly indulgent. The natural vanilla flavor gives each wafer a delightful aroma and taste, making them irresistible. Plus, these wafers can be enjoyed on their own or used as a base for desserts like banana pudding, ice cream sandwiches, or crumbled over yogurt.
How to Make Homemade Vanilla Wafers
Ingredients:
- 1 cup all-purpose flour
- 1/2 cup sugar
- 1/2 teaspoon baking powder
- 1/4 teaspoon salt
- 1/2 cup unsalted butter, softened
- 1 large egg
- 1 teaspoon vanilla extract
Step-by-Step Instructions:
- Preheat your oven to 350°F (175°C).
- In a bowl, mix together the flour, sugar, baking powder, and salt.
- In a separate bowl, cream the softened butter until light and fluffy.
- Beat in the egg and vanilla extract until well combined.
- Gradually add the dry ingredients to the wet ingredients, mixing until just combined.
- Drop small spoonfuls of dough onto a baking sheet lined with parchment paper, spacing them about 2 inches apart.
- Bake for 10-12 minutes or until the edges are lightly golden.
- Allow to cool before serving.
How to Serve Homemade Vanilla Wafers
You can serve homemade vanilla wafers in various delightful ways. They are perfect on their own but can also be paired with fresh fruits, whipped cream, or ice cream. For a traditional twist, create a delicious banana pudding layered with your wafers, fresh bananas, and creamy pudding for a crowd-pleasing dessert. Additionally, crumbling these wafers over yogurt or ice cream can add a lovely crunch and extra flavor.
How to Store Homemade Vanilla Wafers
To store your homemade vanilla wafers, place them in an airtight container once they have cooled completely. These wafers can last for up to a week at room temperature. If you’d like to keep them fresh for a longer period, consider freezing them. Lay the wafers in a single layer on a baking sheet and freeze until solid, then transfer them to a freezer-safe container or bag. They can last up to three months in the freezer.
Tips to Make Homemade Vanilla Wafers Perfect
- Use Room Temperature Butter: Ensure your butter is softened to room temperature for easy creaming and best texture.
- Measure Flour Correctly: Spoon flour into your measuring cup and level it off with a knife. Avoid packing it into the cup, which can lead to dry wafers.
- Cool Thoroughly: Let the wafers cool on the baking sheet for a few minutes before transferring them to a wire rack to cool completely. This will help them crisp up.
Flavor Variations
Feel free to experiment with different flavors in your homemade vanilla wafers. Adding a teaspoon of almond extract can give a nice twist. You might also try incorporating lemon or orange zest for a refreshing citrus note. For chocolate lovers, consider folding in some mini chocolate chips right before baking.
Pro Tips for Success
- Don’t Overmix: Be careful not to overmix the dough after adding the dry ingredients; mixing just until combined will keep the texture light and fluffy.
- Watch the Baking Time: Keep an eye on the wafers as they bake, as they can quickly become overbaked. The edges should be golden, but the center should still be soft.
- Use Parchment Paper: Lining your baking sheet with parchment paper ensures the wafers don’t stick and promotes even baking.
FAQs About Homemade Vanilla Wafers
Can I use whole wheat flour instead of all-purpose flour?
Yes, you can substitute whole wheat flour for all-purpose flour. However, your wafers may have a denser texture. You might need to adjust the liquid slightly as whole wheat flour absorbs more moisture.
Can I make these wafers without an egg?
Yes, you can replace the egg with a flaxseed egg (1 tablespoon of ground flaxseed mixed with 2.5 tablespoons of water, let sit for a few minutes) or use applesauce as a substitute. Each substitute will alter the texture slightly, so choose based on your preference.
Can I store these wafers in the freezer?
Absolutely! Homemade vanilla wafers freeze well. Just make sure they are fully cooled, then stack them in an airtight container with layers of parchment paper in between to prevent sticking.
Final Thoughts
Homemade vanilla wafers are a fantastic addition to your dessert repertoire. Their simple ingredients and easy preparation make them a perfect choice for bakers of all skill levels. With various serving suggestions and flavor variations, you can tailor them to your taste preferences. Give this recipe a try for a delightful treat that is sure to become a family favorite!

Homemade Vanilla Wafers
Ingredients
Method
- Preheat your oven to 350°F (175°C).
- In a bowl, mix together the flour, sugar, baking powder, and salt.
- In a separate bowl, cream the softened butter until light and fluffy.
- Beat in the egg and vanilla extract until well combined.
- Gradually add the dry ingredients to the wet ingredients, mixing until just combined.
- Drop small spoonfuls of dough onto a baking sheet lined with parchment paper, spacing them about 2 inches apart.
- Bake for 10-12 minutes or until the edges are lightly golden.
- Allow to cool before serving.