Red Velvet Cream Cheese Thumbprint Cookies: A Festive Twist on a Classic
Red Velvet Cream Cheese Thumbprint Cookies: A Festive Twist on a Classic
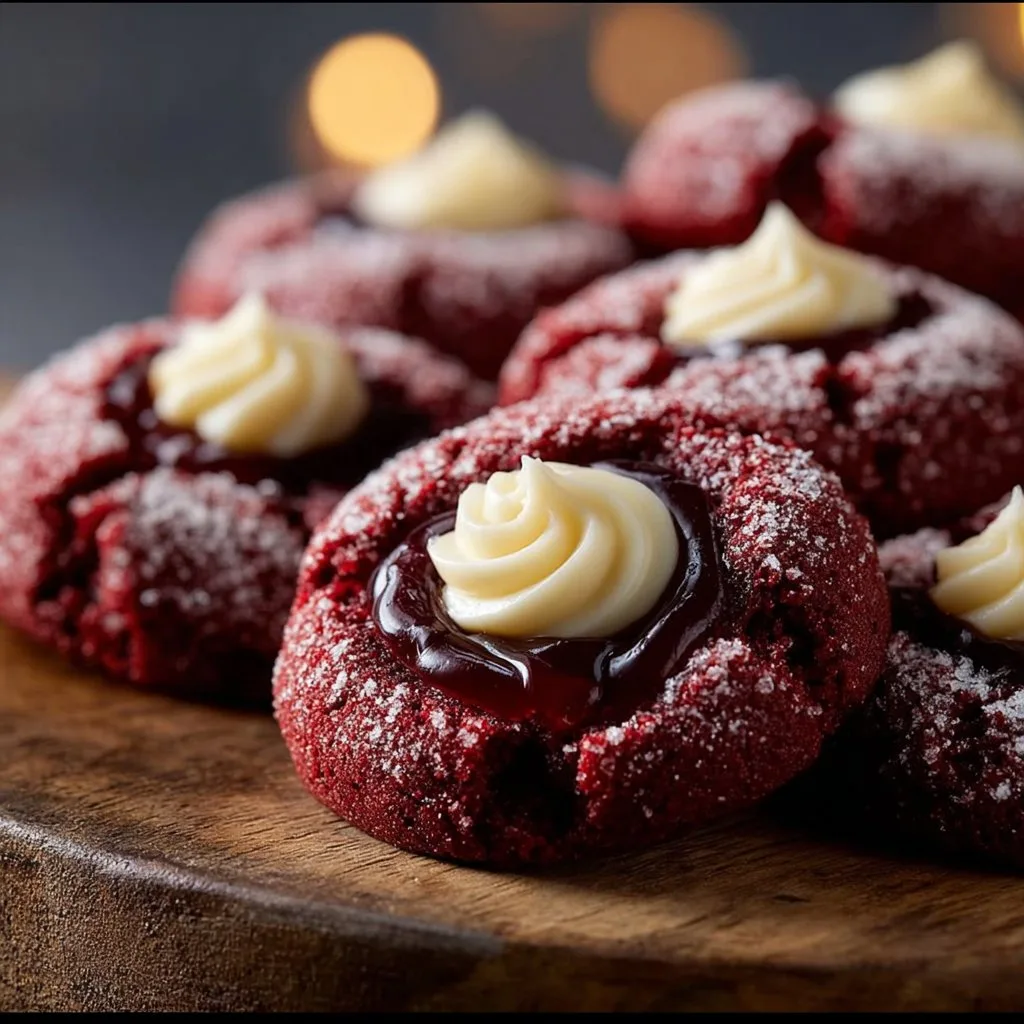
Red Velvet Cream Cheese Thumbprint Cookies bring a delightful blend of flavors and colors to your holiday baking. These cookies combine the rich, velvety taste of red velvet with a luscious cream cheese filling, making them a perfect treat for festive gatherings. Their vibrant color and creamy center not only please the palate but also add a beautiful touch to your cookie platter.
Why You’ll Love This Red Velvet Cream Cheese Thumbprint Cookies
This recipe is not just about aesthetics; it offers an incredible flavor experience. The soft, buttery base paired with the tangy cream cheese filling creates a unique contrast that everyone will adore. Plus, these cookies are effortless to make and are great for both seasoned bakers and novice cooks. If you want to impress your family and friends this holiday season, these cookies are an excellent choice.
How to Make Red Velvet Cream Cheese Thumbprint Cookies
Ingredients:
- 1 cup unsalted butter, softened
- ½ cup brown sugar, packed
- 1 large egg yolk
- 1 teaspoon vanilla extract
- 2 cups all-purpose flour
- 4 teaspoons red food coloring
- 2 teaspoons cocoa powder
- ½ cup granulated sugar or sanding sugar (for rolling)
- 4 ounces full-fat cream cheese, softened
- 1 large egg yolk
- ¼ cup granulated sugar
- ⅛ teaspoon salt
- ¼ teaspoon vanilla extract
Step-by-Step Instructions:
- Prepare Dry Ingredients: In a medium bowl, whisk together the all-purpose flour and cocoa powder. Set aside.
- Cream Butter and Sugar: In a large mixing bowl, cream together the softened unsalted butter and brown sugar until light, fluffy, and noticeably paler. Scrape down the sides of the bowl frequently to ensure even mixing.
- Incorporate Wet Ingredients and Color: With the mixer on medium speed, add the first large egg yolk, 1 teaspoon vanilla extract, and red food coloring. Beat until fully incorporated and the mixture is uniformly vibrant red.
- Combine Wet and Dry Ingredients: With the mixer on low speed, gradually add the flour and cocoa mixture to the wet ingredients, mixing only until just combined after each addition. Be careful not to overmix the dough, as this can lead to tough cookies.
- Chill the Dough: Gently gather the dough into a ball, wrap it tightly in plastic wrap, and refrigerate for at least 1 hour, or up to 2 hours. Chilling helps the flavors meld, firms the butter, and makes the dough easier to handle, preventing excessive spreading during baking.
- Preheat Oven and Prepare Baking Sheets: About 15-20 minutes before baking, preheat your oven to 350°F (175°C). Line baking sheets with parchment paper or silicone baking mats for easy cleanup.
- Form Cookie Balls: Scoop the chilled dough using a small cookie scoop or roll it into 1-inch balls. Gently roll each portion between your palms until it forms a smooth ball. Roll each dough ball in the granulated sugar (or sanding sugar) to coat before placing on the prepared baking sheets.
- Make Thumbprints and Bake: Arrange the sugared cookie balls on the baking sheets, leaving about 2 inches between each. Using your thumb or the back of a rounded teaspoon, gently press an indentation into the center of each cookie ball, ensuring not to press all the way through. Bake for 8-10 minutes. Around the 6-minute mark, gently re-press the indentations to maintain the well. Continue baking until the edges are just set and lightly firm, but the centers still look slightly soft. Do not overbake.
- Cool Cookies: Once baked, carefully transfer the cookies to a wire rack to cool completely. It is crucial that the cookies are fully cooled before adding the cream cheese filling to prevent it from melting.
- Prepare Cream Cheese Filling: In a clean large mixing bowl, combine the softened full-fat cream cheese, the second large egg yolk, ¼ cup granulated sugar, ⅛ teaspoon salt, and ¼ teaspoon vanilla extract. Beat on medium-high speed for 2-3 minutes until the mixture is incredibly smooth, light, and creamy. Scrape down the sides and bottom of the bowl multiple times to ensure thorough incorporation.
- Fill and Finish Cookies: Once cookies are completely cool, spoon or pipe a generous amount of the prepared cream cheese filling into the center of each cookie’s indentation. Fill them just to the brim without overflowing. Optionally, for a festive touch, drizzle with melted white chocolate or sprinkle with holiday sprinkles.
- Set Filling and Serve: Transfer the assembled cookies to the refrigerator for about 15-30 minutes to allow the cream cheese filling to set slightly. These cookies are best enjoyed at room temperature, so take them out of the fridge 15-30 minutes before serving for the optimal creamy texture.
How to Serve Red Velvet Cream Cheese Thumbprint Cookies
Serve these delightful cookies on a festive platter or stack them on a cake stand for an appealing display. Pair them with a glass of milk or a warm cup of tea for a cozy treat. They make excellent gifts, so consider packaging them in a decorative box for friends and family.
How to Store Red Velvet Cream Cheese Thumbprint Cookies
Store these cookies in an airtight container in the refrigerator. They can last up to one week. Allow them to come to room temperature before serving for the best flavor experience. If you plan to keep them longer, you can freeze the cookies before filling them. Just ensure they are well-wrapped, and they will last for up to three months.
Tips to Make Red Velvet Cream Cheese Thumbprint Cookies Perfect
- Don’t Overmix: Combine your ingredients only until they are just mixed to keep the cookies tender.
- Be Gentle with Pressing: Make a shallow indentation in the cookies to hold the cream cheese filling without breaking through the cookie.
- Use Quality Ingredients: Fresh butter and high-quality cream cheese will make a significant difference in flavor.
Flavor Variations
Feel free to experiment with different flavors for the cream cheese filling. You can add lemon zest for a citrusy zing or mix in cocoa powder for a richer chocolate flavor. For a unique twist, consider adding peppermint extract for holiday cookies or almond extract for an unexpected taste.
Pro Tips for Success
- Room Temperature Ingredients: Ensure your butter and cream cheese are at room temperature for easier mixing and a smoother filling.
- Chill After Filling: Allow the cookies to set in the fridge after filling them with cream cheese to retain their shape and texture.
- Uniform Sizing: Use a cookie scoop for equally sized cookies that bake evenly.
FAQs About Red Velvet Cream Cheese Thumbprint Cookies
Q: Can I use a different type of food coloring?
A: Yes, you can use gel food coloring for a richer color or even experiment with natural food dyes if you prefer. However, red food coloring provides the traditional red velvet look.
Q: What if I don’t have cream cheese?
A: If you’re out of cream cheese, you can use mascarpone cheese or cottage cheese blended until smooth as alternatives. However, the flavor will vary from the original recipe.
Q: How can I make these cookies gluten-free?
A: To make these cookies gluten-free, replace the all-purpose flour with a gluten-free all-purpose flour blend. Ensure the blend contains xanthan gum for better texture.
Final Thoughts
Red Velvet Cream Cheese Thumbprint Cookies are a delightful twist on a beloved classic. Their festive look and delicious flavor make them an ideal addition to any holiday celebration. Whether you share them with loved ones or savor them at home, these cookies are sure to become a favorite. Happy baking!

Red Velvet Cream Cheese Thumbprint Cookies
Ingredients
Method
- In a medium bowl, whisk together the all-purpose flour and cocoa powder. Set aside.
- In a large mixing bowl, cream together the softened unsalted butter and brown sugar until light, fluffy, and noticeably paler.
- With the mixer on medium speed, add the egg yolk, 1 teaspoon vanilla extract, and red food coloring. Beat until fully incorporated.
- With the mixer on low speed, gradually add the flour and cocoa mixture, mixing until just combined.
- Gently wrap and refrigerate the dough for at least 1 hour.
- Preheat your oven to 350°F (175°C). Prepare baking sheets with parchment paper.
- Scoop the chilled dough, roll into 1-inch balls, and coat each ball in granulated sugar.
- Place the dough balls on the baking sheets and press an indentation into the center of each.
- Bake for 8-10 minutes. Re-press indentations mid-way through baking.
- Cool cookies on a wire rack completely.
- In a large mixing bowl, mix together cream cheese, egg yolk, sugar, salt, and vanilla extract until smooth.
- Once cookies are cool, fill the indentations with cream cheese filling.
- Chill assembled cookies for 15-30 minutes to set the filling before serving.